Saturday, April 30, 2011

Batch #7 - Zesty Lemon Macarons (Epic Fail!)

Okay, I don't have any photos of Batch Number 7.  They were going to be gloriously yellow, with a zesty lemon filling, good feet, lovely dome and a shiny crust.  My confidence had been boosted by the last few batches, and I was catching up with a friend visiting from overseas on the weekend, and wanted to make a batch for her birthday. 

Alas these little divas can certainly shoot you down.  I made this batch on a Wednesday night, thinking that they will be perfect on the Saturday.  A whole lot of little factors contributed, most important of all I don't think I aged the egg whites enough, but for the life of me I could not beat up a nice meringue.  (I only aged the whites for 4 hours this time.)  I knew my macronage was too flat and runny, not like the desired "molten magma" consistency.  The resultant shells were flat, amoebic, and too, too crunchy.  I pressed on, hoping that the maturation process would save them, but all I got were awful, crunchy macarons that looked ugly and tasted wrong.  The most important lesson I learned from this is that in making macarons, you can not get over-confident.  It doesn't matter how good your last batch was, you're only as good as the next batch you can make.  A lesson in humility indeed!

Lessons Learned :
  • Separate the eggs and age the egg whites at least overnight.  I usually separate the eggs the night before I plan to make macarons, put them in a bowl and into the fridge, then bring them back to room temperature before beating the meringue.  Being the obssessive person I am when weighing out my ingredients, I find that 200g of egg white will lose about 5-10g in weight (ie/moisture) overnight.
  • Don't get over confident!!!!

Thursday, April 28, 2011

Batch #6 - Tahitian Lime & Salted Caramel Macarons


Batch Number 6 was one of my all time favourites.  I wanted to try different flavours again.  The zesty lemon is quite addictive so I thought I'd follow the same citrus track, and inspiration struck when I saw some gorgeous looking tahitian limes at my local green grocers.  It also allowed me to try some green coloring - I love how they turned out!

Stacks of Salted Caramel Macarons on the left, Tahitian Lime on the right.

I also wanted to try making a caramel filling.  Salted caramel is all the rage nowadays, and I never thought I'd like salt in my sweet filling.  However it's amazing how the saltiness makes the buttery sweet caramel all the more enticing.  Instant favourite!  The only thing is that my caramel seemed to have separated a bit after being beaten post-refridgeration.  Nonetheless they tasted pretty good!


I took a picture of how the shells looked inside the oven.  This was taken at about the 8 minute mark.  The "pied" on them makes me want to do the happy feet dance every time!


I was humbled by a request to make macarons for someone's wedding after this batch.  I turned it down as I didn't feel experienced enough yet (and still don't!), and I didn't want to disappoint the lovely bride.  Very happy though, that my macarons are liked by people outside of my family (who wouldn't dare to tell me they don't like'em, hehehe!)

Lessons Learned -
  • The Caramel filling seems to get drawn into the shells faster than the butter cream, thus maturing the macaron faster.
  • Putting cling wrap on top of the caramel prior to it being refridgerated will prevent a skin forming on top of the caramel.
Yet another macaron stack!

Tuesday, April 26, 2011

Eat. @ Ishiya Stonegrill

152 Little Bourke St, Melbourne 3000 ph : (03) 9650 9510


I admit I am a sucker for gimmicky things.  I am amused by things like amuse bouche, fusion cuisine, and cooking at the table top - all of which you can experience at Ishiya.  Lunch at Ishiya offers you a choice of menu sets and also the option of stone grilling, 2 of my favourite ways to eat.  This was a fun-looking lunch which turned out to be quite delicious.  


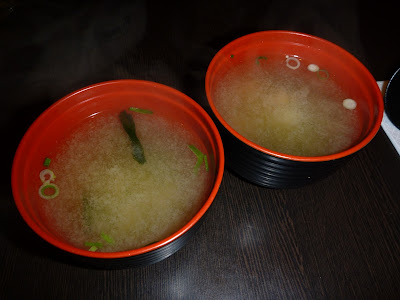
The lunch sets range between $11.90 - $18.90.  Each set consists of a standard platter with steamed rice, miso soup, poached vegetables (we got edamame today), sushi, and a small servie of kara-age (fried chicken).


A choice of main goes with the standard platter.  We had 3 sets, the first was Wagyu Beef Sukiyaki which was served with a sesame sauce.


The Tonkatsu set didn't come with the standard tonkatsu sauce.  The sauce here was saltier and less sour, more like a kecap manis.


And the Tempura Set.


We also wanted to try the stonegrill and ordered a Wagyu Porterhouse.  This was 200gm of porterhouse served on a piece of volcanic rock heated up to 400 degrees celcius.  You then slice the beef thinly and cook it to your liking.  Obviously you want to keep the little ones away from the rock.  Fortunately our kids found this fascinating and tried some of the beef (and loved it), which we cooked well done, but managed to understand the concept of not touching the stone as they watched the beef sizzle away.


This was served with 5 sauces with which you can dip your freshly cooked beef.  My favourite were the ponzu and the sweet teriyaki.

From left - ponzu, tomato salsa, sesame, garlic with white miso,
and sweet teriyaki sauces for dipping
The stonegrill also came with a side serve of sushi and sashimi.


The black sesame ice-cream we ordered for dessert was pleasant, but a bit too icy towards the middle.


Overall this was a fun lunch for us all.  Even without the stonegrill, the set menus on offer for lunch are quite nice and are of a relatively good standard for the price.  We reserved a table and the staff were happy to accomodate our pram, and were otherwise very friendly and helpful. 

Eat.Play.Shop. Recommends : trying out the stonegrill!  Delicious!
Give it a miss : if you have kids ~ 18 months - 3 years who are difficult to settle and would want to touch the hot stone.  You can still have the set lunch menu though!
Ishiya Stone Grill on Urbanspoon

Toilets : Yes

Monday, April 25, 2011

Batch #4+5 - Raspberry White Chocolate Ganache & Lemon Butter Cream


When I made Batch Number 4, I thought they were the best tasting batch yet, although they didn't look as nice.  So I made the same flavours again, and I was happier with the way Batch Number 5 turned out.


Batch 4 on the left, Batch 5 on the right. 
Notice how the shells are a lot flatter in Batch 4! Not happy!

I was still very unsure with how much beating is required to get a good meringue.  I was also very worried of OVER beating the meringue and probably erred by UNDER beating, giving me a runnier macronage and a much flatter shell.
Batch Number 4 - Lemon Zest and Raspberry White Chocolate Ganache
The shells were a bit flat
I was more confident with using the coloring.  Finally brightly colored shells!


I also eliminated the one step that doubled the amount of time it took for me to make the macarons - I stopped passing the TPT (tant pour tant - the icing sugar and almond meal mixture) through a fine sieve, and just gave the food processor a few extra pulses to make sure the almond meal is very fine, and well mixed with the sugar.  The resultant macronage still yielded pretty smooth shells, with not that much noticeable difference.  But boy, my forearms ached a lot less and that probably meant I had a more steady hand in piping and got more evenly shaped shells!


For the filling, I stuck with the Lemon Butter Cream as I'm getting addicted to the zingy, zesty taste of the lemon macarons with a cup of tea! 


The kids always want pink macarons so I thought I'd try some raspberry jam with the white chocolate ganache.  I found that the ganache worked better with double cream.  I was a bit lazy in that I didn't use fresh raspberries, but chose to use a small bit of raspberry jam smeared on one of the shells before piping the ganache on top.

Raspberry White Chocolate Ganache Macarons

I really enjoyed making this bunch of macarons, and had a great time taking photos, as you can see!


Lessons Learned -

  • A stiff meringue is very, very important.  A little tartaric acid can help stablise the foam and you need to get to the firm to stiff peak stage prior to adding the sugar syrup.
  • Different fillings will be absorbed into the shell at different rates.  The raspberry ones were at their best at Day 3-4 of maturation, but by Day 5 the jam had made it all the way THROUGH the shell.
  • After piping, giving the tray a tap on the table will help air bubbles rise to the top, which can then be popped by gently pricking the bubble with a tooth-pick.


Sunday, April 24, 2011

Batch #3 - Lemon Curd Marscapone & Lemon Butter Cream


With Batch #3 I decided to try a totally different flavour by using lemons.  I used a bit more coloring in the macronage this time, but the shells were still not as intensely yellow colored as I would have liked.  Nonetheless, I thought the pastel yellow didn't look too bad.  I think I underbeat the macronage a bit, and so the peaks left after I pipe the shells never quite disappeared.  This resulted in shells that have a slight "nipple" on top.  Fortunately, taste-wise it didn't make any difference.

Peaks on my macaron shells after baking.....

I also tried making 2 different fillings to give my taste-testers some variety.  The first filling I made was a lemon curd marscapone.  I did not have time to make the curd from scratch, (we DO still have to look after the kids while all the macaron-making is happening!), although it would've been a great way to use up all the egg yolks I had left from making the meringue.   I combined some store bought curd with the marscapone.  The resultant filling was a little runnier than I'd like, but firmed up okay with some time spent in the fridge.  The lemon butter cream was easy to make, and I really liked the citrus zing which went really well with the essentially sweet shell.  In the end I think my taste-testers voted the lemon butter cream their favourite. 

Lemon curd marscapone macaron on the left,
lemon butter cream macaron on the right.

Lessons Learned :

  • Letting the macarons mature in the fridge is very, very, VERY important!   When the macarons are first made and assembled, the shells are waaaay too crunchy and the flavour of the filling often has not developed yet .  Depending on the filling, macarons will be ideally matured after 36-72 hours in the fridge.  The reason for this 'waiting time' is that the moisture in the filling needs to be drawn into the shell.  The ideal macaron is slightly crunchy to the bite, with the centre being soft and slightly chewy.  When the macarons are ready to be served, they should be removed from the fridge and brought back to room temperature, which will usually take about 30 minutes.

Saturday, April 23, 2011

Eat. @ Beechworth Bakery Healesville

316 Maroondah Hwy, Healesville 3777 ph : 1300 233 784 (That's 1300 BEESTING, haha!)


I've been a fan of the original Beechworth Bakery since it opened up in various locations around Victoria.  Having worked in country Victoria, I somehow came up with excuses to make the necessary detour to Beechworth more than I should.  I was very happy when they opened up a branch in Healesville.  It's not gourmet food, but good, fresh, standard Bakery food that will fill you up and leave you feeling satisfied.  It's a great stop for breakfast/lunch/brunch prior to visiting the Sanctuary or other attractions in the Yarra Valley.


The pie and sausage rolls are standard bakery lunch items and the ones here tick all the boxes.  Each item comes with a small packet of sauce at no extra cost, and as my friend pointed out, it feels nicer this way, even if they've in reality already included the extra 10 cents in the price of the pie!


The kids had mini quiches.  At $2 each they're pretty expensive for a bakery item.  Of course this is followed by the obligatory novelty biscuit/cupcake/treat aimed at the junior crowd.


The toasted sandwich comes in ham and cheese, ham chesse and tomato, and an egg and bacon variety.  Good thick slices of bread, melted cheese and generous amount of butter makes this a favourite for adults and kids alike.


Their vanilla slice is again standard bakery fare.  Hubby did not like his jelly slice - too much gelatine and too bland for his liking.  (I agree)  He sees himself as a jelly slice connoiseur as he's a habitual bakery patron.


They make coffee to order, but also have bottomless cups of tea and percolater coffee for $3.  There's a variety of teas to choose from, including green tea and english breakfast tea.


There's plenty of seating inside, and also out the front and round the back.  On cold days there's a woodfire, and there's a good sized play pan with toys for the younger kids if you want to sit around and enjoy a cuppa.  They are obviously well set up for families with children on holidays and day trips!


If that's not enough there are also souvenirs for sale.  And of course all the bakery items can be bought and taken home or on a picnic at your next destination.


Eat.Play.Shop. Recommends - The ham and cheese toastie.  I know you can make this at home but it's very, very nice here.
Give it a Miss - The jelly slice.  Ask my Hubby.

Beechworth Bakery Healesville on Urbanspoon

Toilets - Yes.  Very clean.  Change table in the disabled toilet.
Highchair - Yes.  The step-on-a-chair type.

Batch #2 - Chocolate Orange Ganache Macarons


A lot happier with my second batch of macarons.  Still not perfect but I think the shape of the shells are nicer than those of the previous batch.

Pink macaron with Chocolate Orange Ganache

Yes the shells are pink again, as requested by the kids; and as they are my main "customers", you'll see pink shells A LOT when I'm making macarons.  The shells from the last batch were a very pale pink and had no relation whatsoever to the flavour.  This time round I knew I wanted to make orange infused dark chocolate ganache filling, so I tried to make orange shells.  Not heavy handed enough so they came out a strange shade of apricot....


Taking pictures of the underside of my macarons makes me feel a bit exposed, since even if the shell looks perfect on top, the bottom can be atrocious (although easily hidden by the filling!)  I find the bottom part hard to perfect and are often too soft.  I have been doubling up my trays as per many of the recipes I've read about, but it's true that every oven is different.  I get better shells when I just bake with one tray.


The major problem I had with this batch was the ganache.  Ganache attempt number 1 went into the bin.  I was trying the recipe on the masterchef website using butter as well as chocolate and cream.  The whole thing separated into an oily mess and so I had to toss it.  Attempt number 2 using only cream and chocolate worked much better.  The flavour of the macarons were not bad but I'm not impressed by the orange flavour I got using essence, and will have to figure out a better way of infusing flavours into the ganache.

Plate of macarons!  Happy feet make me happy!

Lessons Learned :
  • The shells will lighten in color after being baked, so don't be afraid to use a bit more coloring. 
  • Have spare ingredients on hand in case something stuffs up, or else you or Hubby will have to drive and pick up some more at the shops in a hurry!

Friday, April 22, 2011

Batch #1 - Chocolate Butter Cream Macarons

Chocolate Butter Cream Macaron
I decided to try and make macarons at the start of this year, to combat the fact that my Macaron Monster can literally eat me poor if I was to buy these treats as often as we'd like.  I have read EVERYWHERE that these are really the divas of the Sweets world - any mistake in any of the many steps involved in the recipe can turn a potentially beautiful batch of macaron into a disaster.  I am no creative chef, and being slightly obssessive I did lots and lots of research, read many recipes, tips and warnings, before I finally jumped in and gave it a go.  I decided to make macarons au sucre cuit - Italian Meringue method - more fiddly, but more stable and slightly less likely to go wrong.


This first batch was both encouraging and disappointing.  I was excited by the fact that I got feet on the shells, and happy that I got the shells to be relatively smooth and shiny.  But the shapes were awful and the shells were way too flat!
Ugly shell, but happy feet!
Because this was the first time I made these, it took a loooong time.  By the time I got to making the filling, I had run out of enthusiasm.  In a hurry to have a try, I sandwiched 2 macarons together with some cream. (Gasp!)  Luckily it tasted okay and it renewed my enthusiasm, and I got back into it and made a chocolate butter cream filling.  Learnt many lessons for the next batch!


Lessons Learned :
  • When making the meringue, the egg white needs to be quite well beaten prior to pouring in the sugar syrup.  I didn't beat the white enough and that's what led to the flat shells.
  • Consequently the macronage was too runny, therefore I had yucky irregular amoeba shaped macraons.